Hot End
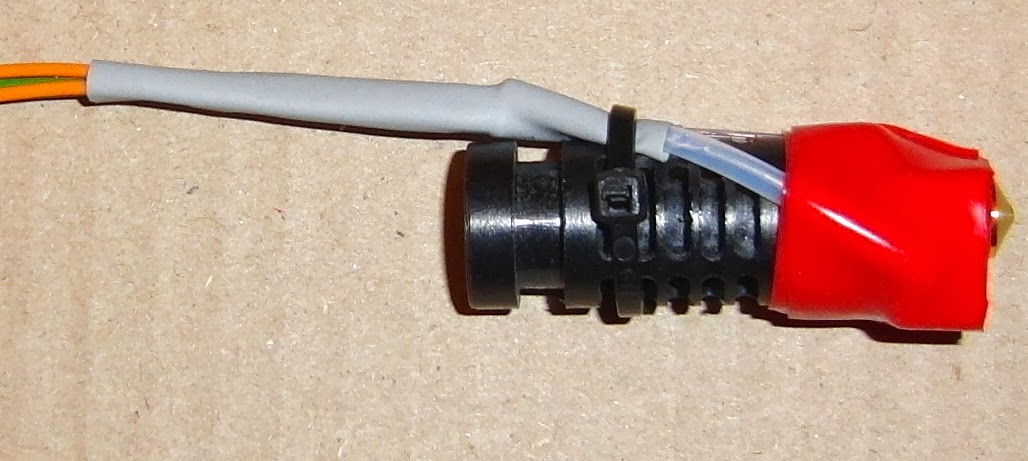
It came to light during the hot summer that the top of the J-Head can get too hot for extruding PLA. The problem seems to manifest itself when extruding slowly because it takes longer for the filament to pass through the hex grub screw (which is the Achilles heel of the J-Head because it is wider than the rest of the filament path) and so has enough time to soften and buckle. Ironically it is also more of a problem when extruding at lower temperatures because the filament gets harder to push and so buckles at a lower temperature.On investigation I found what I had suspected for a long time: that the heat at the top is mainly due to convection rather than conduction. This is easily demonstrated by running the extruder on its side. A lot of people add a second fan but a simple solution is to insulate the heater block. I now wrap it in two turns of silicone "self amalgamating" or "self fusing" tape, which is rated for 260°C. There are several brands but I use E-Z Fuse Tape which is 25mm wide. I stretch 110mm of it around the bottom of the PEEK, just below the bottom vent slots. I then trim it flush with the bottom of the heater block with a pair of scissors.

It is possible to drill the hole to upgrade an old fan duct but straight drilling will spit the layers apart as it is a very thin wall. The way I did it was to melt a hole using a soldering iron with a conical bit set to 200°C. At that temperature you can wipe the ABS off the bit before it has chance to burn and make a mess of it. I then clean up the hole by drilling the melted ring it with a 4.5mm drill and then trim it flush with a penknife.
Another mod I made was to apply a bit more pressure to the idler by adding washers to each end of the springs. The same effect can be achieved by tightening the screws so they go about 1.5mm past the back of the bearing block but I like them flush with the block for an easier reference point.

These three little changes made a big difference and I can now extrude PLA at 185°C, which gives better print quality. I have updated the android gcode I include on the SD card and I have put the new Skeinforge settings on Github.
Settings
Other improvements I made to the settings are: -The PLA settings were erroneously under the ABS profile, sorry for the confusion. The un-configured profiles have been removed and two new ones: PLA0.3 and PLA0.2 have been added. The android sample is sliced with the 0.3mm layer profile because it is easier to get the Z calibration right with the highest layer height possible with PLA. The 0.2mm profile gives a much nicer print.
The ooze free unattended start was not very reliable with PLA. Lowering the temperature helped but I also improved the extruder priming by extruding a very fat line along the front edge of the bed instead of a blob.
I have come to realise that you get better prints if you do the outlines at the same speed as the infill and looking back I think that is what I have seen commercial machines do. The old profiles had the outlines at 25mm/s and infill at 50mm/s. I now do both at 40mm/s.
The reason it works better is because when the extruder rewinds at the end of one run and then fast forwards the same distance to start another it will restore the same nozzle pressure as it had on the previous run. That means the initial flow rate will be the same, so if the speed has changed it will be too fast or too slow. This leads to blobs on the outline after doing faster infill and gaps at the start of infill after doing slow outlines.
Another advantage is with a constant flow rate the plug of plastic that forms at the hot end transition zone will be a constant length. If the speed increases the length reduces, which means less of the barrel has plastic expanded to the barrel's diameter and more has it at the original filament diameter. This implies there is less plastic in the barrel, so an excess must have been extruded while the plug was shortening. Conversely when the extrusion rate drops the plug extends so too little plastic will be extruded during that time.
Yet another advantage of using constant flow rate is that the die swell will be constant, so the plastic is always stretched by the same amount. When outlines are done slower the die swell is less, so they are stretched less, and so don't span gaps as well as the infill.
I have set the outline flow rates slightly lower than the infill. Skeinforge's volumetric calculations fill a rectangle equal to the filament width and layer height. This is OK for the infill but the outline does not have a rectangular profile, it has rounded sides, so it comes out a little wider than intended. The error is less when the filament path is wide compared to its height. The correct value is 1 + (π/4 - 1) / (w / h). Using this formula I get dimensionally correct prints instead of outlines that are too big and holes that are too small.
PLA prints better when cooled by the fan but you don't want it cooling the print surface when the first layer is being laid down. Ironically print cooling seems to be more important when extruding at 185°C than at 220°C for reasons I can't yet explain. To be able to automatically turn the fan on at a specified layer I had to incorporate an update to the Cool plugin by DeuxVis and Joost-b plus my own little bug fix. I have put the patched version of Skeinforge50 that I include on the SD card onto Github.
Firmware
I made three small tweaks to the version of Marlin I distribute: -
I reduced the XY acceleration from 4000 to 2000 as the Y axis can lose steps due to resonance in high frequency infill otherwise.
I found that the Y axis would overshoot when homing if the X axis hits the end stop first. This was because the axis moves 40% faster on it own than when moving diagonally. I reduced the homing speeds but multiplied them by 1.4 when moving diagonally. The net effect is diagonal homing is the same speed as before but it now doesn't speed up when one axis stops.
I updated the PID constants for J-Head MK5B as I hadn't changed them from MK4B. It didn't seem to make much difference.
X ends
A few people started reporting the bar clamps on the X motor bracket and the X idler bracket had cracked. I am not sure why this became a problem after hundreds of kits. Some reported they could not get enough tension to pull the belt tight, so perhaps the belt got stiffer, or the plastic parts weaker. I built a kit myself to investigate using a problem belt that one of my customers returned. It was inconclusive because I managed to get the machine printing well without breaking the clamps but I think some belts are stiffer than they were in the first kits, despite coming from the same manufacturer and I also think the plastic parts might not be as strong as they used to be due to ABS supply changing. I tackled the problem from both sides by immediately switching to more flexible belt and then redesigning the X end clamps.I switched to Brecoflex® belt which has more thinner wires in it and also boasts that it has a better arrangement of strands within each wire. This makes it more flexible without being less strong. The wires are also parallel, whereas cheaper belts have them in a spiral so they meet the edge every so often.
The clamps now only have plastic in compression so are much stronger. They do use a lot more fasteners but because the screws are accessible from above they no longer need to have hex heads, so that is one less type of screw required.

The nut trap for the lead screw is now at the top (don't be fooled by the hexagonal hole at the bottom, that is just clearance to allow the nut to be fitted to the leadscrew first). This greatly increases the distance of the nut from the Z coupling when the Z axis is at the bottom. When the nut was at the bottom it got to within about 10mm so any eccentricity was magnified by about 20 at the top of the leadscrew.
Because holes can't be printed in mid air there are one layer thick support membranes at the bottom and the top of the nut trap. This creates a completely enclosed void which revealed a bug in OpenScad. It generates an STL with the internal faces facing the wrong way, i.e. outwards instead of inwards. Fortunately Skeinforge does not care and slices it correctly but Slic3r doesn't.
Another little tweak to the design was to angle the hole for the idler axle. It is a clearance hole so the belt tension pulls the front of the bolt to the right, which tends to make the belt run to the front of the idler pulley, requiring a shim under the back washer to correct it. The new design angles the bolt hole slightly to correct for this so doesn't require a shim. Here is a cross section showing that when the axle bolt is orthogonal the front rests against the right side of the hole and the nut at the back rests on the left side of its trap.

The X motor bracket has been simplified and made much easier to print. The previous design fastened the motor with three screws at the front and used a box construction to be stiff enough not to bend under the belt tension. The new design has one screw in the back of the motor so that only two are needed at the front leading to a much smaller bracket.

The length of stepper motors has a poor tolerance of ±1mm because it is made from a stack of laminations pressed together. For this reason I couldn't use a normal screw through the plastic. Instead the screw head is packed out with as many washers needed to fill the gap between the motor and the bracket. This will be one if the motor is top tolerance and five if it is bottom tolerance. The hole in the bracket is a snug fit for the head of the screw so it acts as a dowel.

Like the idler, the clearance screw holes for the motor would allow the front to be pulled to the left causing the belt to run to the front of the pulley. The motor holes have been offset by half their clearance to avoid this.

Z couplings
The original Z couplings worked well on all of my machines until I built another one that produced objects with some Z banding. Investigation with a dial gauge showed that the Z position was not increasing linearly leading to uneven layer heights. I found that the lead screw was eccentric leaving the coupling due to the bore of the PVC tubing not being central. Also PVC is more plastic than elastic, so when it is squeezed by the coupling it deforms permanently and does not give much flexibility. The couplings where designed with a gap so it was possible to over tighten them leading to too much constraint. The top needed to be fully closed because the studding has a smaller outside diameter than a normal M6 bolt would have.To address these issues I switched to neoprene rubber tubing that seems to have the bore more central and is also a lot more flexible. I changed the plastic parts so they can be closed completely to give the correct pressure rather than relying on a gap being maintained. I also made the screw positions diagonally opposite which makes them a bit easier to tighten up.

The only downside to the neoprene is that it doesn't give enough grip to be able to turn the motor manually when it is enabled. To allow bed levelling I changed the Pronterface buttons for back left and back right to disable the motors. The new config file is on Github.
X carriage fan bracket
The length of the J-Head MK5B is incorrect in the Mendel90 model. This makes the fan duct too low and it hits the clips on the bed. A simple solution is to make the slots in the fan bracket deeper so it can be fitted a bit higher. I also added strengthening ribs as the old bracket allowed the duct to droop.

Tube end caps
I reversed the direction of the screws that hold the aluminium tubes onto the base. The nut is now trapped inside the tube by the end cap. This means the tube no longer needs the large holes for the screw head, which greatly reduces the amount of machining I need to do to make them.


Y carriage heat shield
Instead of using aluminium foil to reflect heat I found that simply filling the gap under the bed with multiple layers of corrugated cardboard allows the bed to reach higher temperatures.

Spool Holders
These are now assembled with the large washer on the outside of the spool rather than the inside, requiring four more small washers. This is to accommodate spools that originate from Orbitech that are slightly wider than the ones I used to get.


